October 28, 2012

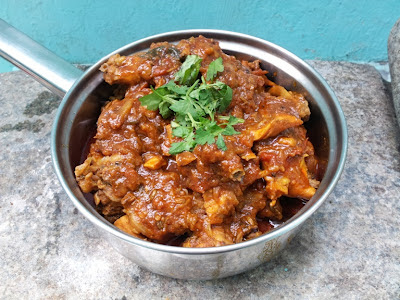
Carrot Dosai

     You know who owns the Fuzzy eater title ever ??!! Its my lil one. Daily i need to struggle with her to make her eat but it will end up in diaster always. eventhough, daily am excavating a different recipe but still it will be her favy for one days. Again i need to go for excavation process :(( When she was a baby, i can manage somewhat but now as she is a school goers, really "Make her eat" process is becoming tedious :( So, as usual i thought of something to prepare differently with very basic ingredients and at the same time it should be likey to my kid. Finally, Shaaaabbbbaaaaaa.... She liked it !!! Yipppppeeeeeee !!!! :)


ALL YOU NEED:
Dosa Batter 1 cup
Chopped Carrot 1 No.
Honey 1 spoon
Oil/Ghee 1 spoon

METHOD:
     Heat the dosa pan by greasing it with a spoon of oil/ghee. Once the pan gets heated, pour 1 cup of Dosa batter over the pan. Then add the chopped carrot. Add a spoon of oil/ghee around the border and a spoon of honey on top of the carrot. Allow it to sit for 2 mins. Then turn the dosa with spatula. Allow it to cook for 3 mins. Replace it in a plate and serve hot. Our lil one will enjoy like anything.

♬ Sangeetha♡Nambi ♬

October 23, 2012

Daahi Kaara Bhoondi

     I am not a lover of oil items. So, its very rare that i taste oil items or prepare oil items at home. But during that rare cases, my choice will store bought Onion Pakoras and Kaara Bhoodi. This dish was an instant one. I remember that was a weekend evening, thought of munching somethingJust like that i prepared this with simple inhouse ingredients. I always love to taste Kaara Bhoondi with thick curd rather than having it planing Kaara Bhoondi. Here comes my most favy Daahi chat :)


ALL YOU NEED:
Kaara Bhoondi 1 cup
Think Curd 3 spoons
Green Chilly 1 No.
Chopped Onion 1 No.
Corainder Leaf 2 Twigs

METHOD:
    Take a bowl of Kaara Bhoondi. Add 3 spoons of thick curd, mix well until curd coats all the Bhoondis. Now add chopped onion, chopped green chilly and corainder leaf. Serve immediately. If it gets delayed, crispy texture of Kaara Bhoondi will go off.

♬ Sangeetha♡Nambi ♬

October 17, 2012

Fried Idly

     After a week's gap, here is, self tried recipe which is a real Kids delight. This is the newly excavated recipe by me. You want to know the secret behind this??!! Here comes..... One fine day(!), my hubby asked me to prepare Sambar Mini Idly, so to make it as a perfect breakfast, i prepared Hotel Sambar and Coconut chutney and served a perfect hot pot sambar idly. Since he need more sambar, he asked me to bring the Sambar bowl and even i gave it and was doing some work in kitchen without having my breakfast. After my kitchen work, i was in big temptation to taste my most favy sambar idly. When i opened the Sambar bowl, i was like EEEEEEERRRRRRRR....... Sambar bowl was totally dry cleaned by my soooooo affectionate hubby and my lil one :( ONLY left was mini idlies. I am not a big lover of plain idly. So, an idea got flashed, surfed my fridge for Dhall powder, Wow ! luckily i got it. Just fried those idly with dhall powder in a pan, OMG ! it had a heavenly taste. Really Yummy ! so, this is the reason behind and here comes the procedure....


ALL YOU NEED:
Mini Idlies 1 plate
Instant Dhall/Garlic Powder 3 spoons
Oil/Ghee 2 spoons

METHOD:
    Heat a pan with a 2 spoons of oil/ghee. Then add the mini idlies. Let it fry for some 5 mins. Now add the Dhall/Garlic Powder and give a soft stir with the idlies. Allow the powder get coated well with Idlies and until it reaches crispy consistency. That's all.... So simple is it ?? Serve hot from the flame...

Note: Non-stick pan is recommended to prepare this dish.

♬ Sangeetha♡Nambi ♬

October 12, 2012

Guest Post IV

It seems this month going to be a "GUEST POST" Week. Yeah ! another Guest post here. This is from Jay of Tasty Appetite. When i pinged her to send the recipe for Guest Post, she didnt hesitate but she asked me to wait for few days as she was in her vacation. To be frank, i thought i need to give a remainder about guest post after a week but as soon as she back from her vacation, she immediately sent me the post with step by step clicks. How sweet she is... Really I am so impressed Jay. Thanks much...

Gals, you know what recipe she has sent me itssssssss......... "Chettinad Eral Kuzhambu" OMG ! name itself tempting me... I am an ardent fan of Prawn... Without making you to wait further, here comesssssss the yummy curry in her own sweet (You know why telling sweet, b'cos she praised me, Note the bolded line :P) words.... Slurrp !

Main Course....... :)

"Hello Friends, I’m so pleased to have been asked to guest post for Sangeetha,  and it really means a lot to me. I got to know Sangeetha, over the past year and "I really love her healthy recipe collections & nice presentation". :P

Once again, thank you friend, for choosing me for the guest post and I’m really honoured..:)

So glad to share with you all here today,  a very popular dish, "Eral Kuzhambu“ (Thick gravy) in Chettinad style.!

The recipe is simple and very delicious to eat with. The shrimp / prawns are cooked with a combination of drumsticks and flavored with ground coconut paste. It goes well with plain rice , papads or else.

Tingle your tastebuds with this traditional and mouthwatering Chettinad Eral Kuzhambu recipe..:)
ALL YOU NEED:
Prawn / Shrimp / Eral 300 g
Drumstick 1 No.
Onion 1 No.
Garlic 4 to 5 pods
Green Chilly 1 No.
Tomato 2 No.
Gingely Oil (or) Cooking oil 2 to 3 tbsp
Mustard 1/4 tsp
Cumin Seeds 1/2 tsp
Fenugreek Seeds 1/2 tsp
Curry Leaves 6 to 8 Nos.
Turmeric Powder 1/4 tsp
Red chilly Powder 1 tsp
Corainder Powder 2 tsp
Thick tamarind pulp 4 tbsp
Jaggery 2 pinch
Coconut Paste 4 tbsp
Coriander Leaf Fresh
Salt To Taste

METHOD:
  1. Peel, de-vein and clean the prawns thoroughly and keep aside.
  2. Chop drumstick, onion, tomato to fine slices.
  3. Heat oil in a kadai / pan and temper with mustard, cumin seeds, fenugreek & curry leaves.
  4. Add chopped onion, garlic, green chilly and fry them till transculent.
  5. Add in the finely chopped tomatoes and sauté well.
  6. Now add drumsticks and combine well.
  7. Add cleaned prawns and sauté in together.
  8. Add turmeric pwd, red chilly pwd, coriander pwd and salt.
  9. Mix well. Allow the prawns to get cooked in the masala.
  10. Once the masala thickens and let out oil, add thick tamarind juice, water and jaggery.
  11. Keep the flame in simmer for 6 to 7 mins and cook covered.
  12. Add the ground coconut paste and boil for 2 more minutes.
  13. Now you can see,  oil floats on top of the thick curry.
  14. Time to turn off flame.
  15. Transfer Eral Kuzhambu to  serving bowl with fresh coriander leaves garnishing.
  16. It makes an awesome combo with white rice & pappadam.


Step by step....
Try this tasty recipe, sure you’ll love it..:)

Your comments & suggestions shall help me a lot and inspire me to make more dishes.

Once again thanks Sangeetha for this nice opportunity..!"
♬ Sangeetha♡Nambi ♬

October 6, 2012

Guest Post III

     Its another GUEST POST from another Master.... As i already stated in my previous post, today am going to reveal who is that master is.... Yesssssssss !!! Before revealing about the profile, just want to tell a few words about my Guest. I know her from the day one i become a blogger. She will be the first commentor in all my post, many times. She motivated in many ways and the only blog which i admired in my begineer day is her blog. I love all her post mainly the clicks she use to post. Even i have forced her many times to place step by step pictures but due to some space contraints she restricted herself. But strictly i told her, i need step by step clicks for this guest post as i have loads of space in my blog :P Well, without rejecting my request, even she sent a beautiful recipe with wonderful clicks. Ok Ok... I understand, without any further delay, today's Guest Post was done by Priya of Priya's Versatile Recipes. Applause !!!!! :) Here comes her flavourful "Herbed breadsticks" for you gals, Enjoy !!!

Real flavored Bread Sticks....

ALL YOU NEED:
All purpose flour 2 cups
Whole wheat flour 1 cup
Active dry yeast 1 tbsp
Luke warm milk 1/2 cup
Coriander leaves (chopped) 2 tbsp
Dry Oregano 1/2 tsp
Dry Thymn leaves 1/2 tsp
Dry red chilly flakes 1 tsp
Butter (room temperature) 1 tbsp
Olive oil 2 tbsp
Sugar 1 tsp
Salt 1 tsp

My long time aim... Step by Step clicks of Priya.... :)
METHOD:

1. Add the yeast,sugar and salt to the luke warm water and keep aside until the yeast turns foamy.
2. Take the flours in a bowl with chopped coriander leaves,dry oregano and dry thymn leaves,add gradually the foamy yeast,olive oil and water.
3. Knead as a soft and smooth dough,cover the bowl and keep the dough in a warm place for two hours..
4. Once they doubled their size,punch down the dough,dust the dough with flour and roll them as a medium size long rope like strips.
5. Arrange the rolled breadsticks over a baking sheet lined over the baking tray.
6. Preheat the oven to 350F.
7. Arrange the baking pan in middle rack of the oven and bake for 25-30 minutes until the crust of the bread stick turns golden brown.
8. Brush immediately the bread sticks with the butter.
9. Serve warm with a bowl of soup.

Thanks for giving me an opportunity for making this guest post. - Priya

Priya, my heartfelt thanks for accpeting my request and contributing to my space... Thanks much again.... Friends, do visit her space, when u find time... You'll get lot of stuff there... Please dont miss it....

♬ Sangeetha♡Nambi ♬

October 2, 2012

Guest Post II

     Its GUEST POST again.... Nowadays me become "LIKE" NO NO "REAL" Lazy girl to compose a recipe post. At the same time, i dont want to leave my blog space too. So after a big discussion with my brain !, decided to post a couple of GUEST POST which i got from my co-bloggers. Those two persons are really THE MASTERS in our food blogging world. Yes, one is Aarthi of YUMMY TUMMY and another one is SHUUUUUUUUUU !!! Its S E C R E T !!! Will reveal it in my next post which her guest post too... :)

    Now, let me tell some words about Aarthi. Just a couple of months back, i got a chance to visit her space. From that time to till date, i never stopped visiting her space even she didnt post any recipe :) She is a newly married gal but when we check her blog, we feel like visiting a 25 yrs old married women's blog. Yes, she has a huge huge, Plenty plenty, different different (Watlese!) varieties of recipe in her space that too with Step by Step recipe. Always i use to wonder/admire how she gets time to take a click of every steps !!! Major highlight was, she use to click the ingredients used and label it accordingly. OMG ! i am impressed aarthi. So, here comes here "CHICKEN CURRY" in her own words....

Here it is.......

Over to Aarthi:
    **When I was asked to do a guest post by Sangeetha, I never wanted to say no to her..I accepted immediately..Thank you Sangeetha for giving me this opportunity to post my recipe in your awesome blog. I am really happy to meet all your viewers and do this post for them.

Let me tell something about me..

"Hai Friends.. My Name is Aarthi, I blog at YUMMY TUMMY. It is a food blog which has recipes around the world in step by step instructions with pictures which will be so helpful to you(I hope). I welcome all of you to come and explore my blog."
Now let me talk something about this recipe.. This is one of very basic chicken curry you could make. It calls for very basic ingredients, so you can whip up this no time. The cool thing about this is it is cooked in a pressure cooker which cooks the chicken quickly and makes it so meltingly tender..
I hope you will love this. Drop at my place sometime.
."

ALL YOU NEED:
Fennel Seeds / Saunf 2 tsp
Ginger Garlic Paste 2 tblspn
Garam Masala Powder 2 tsp
Curry leaves 1 twig
Chilli Powder 2 tsp
Onion large sliced 2 Nos.
Chicken 1/2 kg
Chopped Tomato 4 Nos.
Salt 3 tblspn
Oil To Taste

Her well-owned step by step clicks....

METHOD:

1. Take a pressure cooker and heat oil in it. Add in fennel seeds and let it crack.
2. Add in onions and saute for 5 mins.
3. Add in ginger garlic paste and mix well.
4. Now add in salt and all the spice powders and mix well.
5. Throw in tomatoes and curry leaves and cook till the tomatoes turn mushy.
6. Add in chicken pieces and toss well in the masala.
7. Now cover the pressure cooker and let it cook for 4 whistle. Now lower the flame and cook for 15 mins
on a low flame. Switch off the flame and let the pressure go all by itself.
8. Open the pressure cooker and add coriander leaves and mix well.
9. Serve with rice or roti.**

Aarthi, my heartfelt thanks for accpeting my request and contributing to my space... Thanks much again.... Friends, do visit her space, when u find time... You'll get lot of stuff there... Please dont miss it....

Check the GUEST POST I here...

♬ Sangeetha♡Nambi ♬

October 28, 2012

Carrot Dosai

     You know who owns the Fuzzy eater title ever ??!! Its my lil one. Daily i need to struggle with her to make her eat but it will end up in diaster always. eventhough, daily am excavating a different recipe but still it will be her favy for one days. Again i need to go for excavation process :(( When she was a baby, i can manage somewhat but now as she is a school goers, really "Make her eat" process is becoming tedious :( So, as usual i thought of something to prepare differently with very basic ingredients and at the same time it should be likey to my kid. Finally, Shaaaabbbbaaaaaa.... She liked it !!! Yipppppeeeeeee !!!! :)


ALL YOU NEED:
Dosa Batter 1 cup
Chopped Carrot 1 No.
Honey 1 spoon
Oil/Ghee 1 spoon

METHOD:
     Heat the dosa pan by greasing it with a spoon of oil/ghee. Once the pan gets heated, pour 1 cup of Dosa batter over the pan. Then add the chopped carrot. Add a spoon of oil/ghee around the border and a spoon of honey on top of the carrot. Allow it to sit for 2 mins. Then turn the dosa with spatula. Allow it to cook for 3 mins. Replace it in a plate and serve hot. Our lil one will enjoy like anything.

♬ Sangeetha♡Nambi ♬

October 23, 2012

Daahi Kaara Bhoondi

     I am not a lover of oil items. So, its very rare that i taste oil items or prepare oil items at home. But during that rare cases, my choice will store bought Onion Pakoras and Kaara Bhoodi. This dish was an instant one. I remember that was a weekend evening, thought of munching somethingJust like that i prepared this with simple inhouse ingredients. I always love to taste Kaara Bhoondi with thick curd rather than having it planing Kaara Bhoondi. Here comes my most favy Daahi chat :)


ALL YOU NEED:
Kaara Bhoondi 1 cup
Think Curd 3 spoons
Green Chilly 1 No.
Chopped Onion 1 No.
Corainder Leaf 2 Twigs

METHOD:
    Take a bowl of Kaara Bhoondi. Add 3 spoons of thick curd, mix well until curd coats all the Bhoondis. Now add chopped onion, chopped green chilly and corainder leaf. Serve immediately. If it gets delayed, crispy texture of Kaara Bhoondi will go off.

♬ Sangeetha♡Nambi ♬

October 17, 2012

Fried Idly

     After a week's gap, here is, self tried recipe which is a real Kids delight. This is the newly excavated recipe by me. You want to know the secret behind this??!! Here comes..... One fine day(!), my hubby asked me to prepare Sambar Mini Idly, so to make it as a perfect breakfast, i prepared Hotel Sambar and Coconut chutney and served a perfect hot pot sambar idly. Since he need more sambar, he asked me to bring the Sambar bowl and even i gave it and was doing some work in kitchen without having my breakfast. After my kitchen work, i was in big temptation to taste my most favy sambar idly. When i opened the Sambar bowl, i was like EEEEEEERRRRRRRR....... Sambar bowl was totally dry cleaned by my soooooo affectionate hubby and my lil one :( ONLY left was mini idlies. I am not a big lover of plain idly. So, an idea got flashed, surfed my fridge for Dhall powder, Wow ! luckily i got it. Just fried those idly with dhall powder in a pan, OMG ! it had a heavenly taste. Really Yummy ! so, this is the reason behind and here comes the procedure....


ALL YOU NEED:
Mini Idlies 1 plate
Instant Dhall/Garlic Powder 3 spoons
Oil/Ghee 2 spoons

METHOD:
    Heat a pan with a 2 spoons of oil/ghee. Then add the mini idlies. Let it fry for some 5 mins. Now add the Dhall/Garlic Powder and give a soft stir with the idlies. Allow the powder get coated well with Idlies and until it reaches crispy consistency. That's all.... So simple is it ?? Serve hot from the flame...

Note: Non-stick pan is recommended to prepare this dish.

♬ Sangeetha♡Nambi ♬

October 12, 2012

Guest Post IV

It seems this month going to be a "GUEST POST" Week. Yeah ! another Guest post here. This is from Jay of Tasty Appetite. When i pinged her to send the recipe for Guest Post, she didnt hesitate but she asked me to wait for few days as she was in her vacation. To be frank, i thought i need to give a remainder about guest post after a week but as soon as she back from her vacation, she immediately sent me the post with step by step clicks. How sweet she is... Really I am so impressed Jay. Thanks much...

Gals, you know what recipe she has sent me itssssssss......... "Chettinad Eral Kuzhambu" OMG ! name itself tempting me... I am an ardent fan of Prawn... Without making you to wait further, here comesssssss the yummy curry in her own sweet (You know why telling sweet, b'cos she praised me, Note the bolded line :P) words.... Slurrp !

Main Course....... :)

"Hello Friends, I’m so pleased to have been asked to guest post for Sangeetha,  and it really means a lot to me. I got to know Sangeetha, over the past year and "I really love her healthy recipe collections & nice presentation". :P

Once again, thank you friend, for choosing me for the guest post and I’m really honoured..:)

So glad to share with you all here today,  a very popular dish, "Eral Kuzhambu“ (Thick gravy) in Chettinad style.!

The recipe is simple and very delicious to eat with. The shrimp / prawns are cooked with a combination of drumsticks and flavored with ground coconut paste. It goes well with plain rice , papads or else.

Tingle your tastebuds with this traditional and mouthwatering Chettinad Eral Kuzhambu recipe..:)
ALL YOU NEED:
Prawn / Shrimp / Eral 300 g
Drumstick 1 No.
Onion 1 No.
Garlic 4 to 5 pods
Green Chilly 1 No.
Tomato 2 No.
Gingely Oil (or) Cooking oil 2 to 3 tbsp
Mustard 1/4 tsp
Cumin Seeds 1/2 tsp
Fenugreek Seeds 1/2 tsp
Curry Leaves 6 to 8 Nos.
Turmeric Powder 1/4 tsp
Red chilly Powder 1 tsp
Corainder Powder 2 tsp
Thick tamarind pulp 4 tbsp
Jaggery 2 pinch
Coconut Paste 4 tbsp
Coriander Leaf Fresh
Salt To Taste

METHOD:
  1. Peel, de-vein and clean the prawns thoroughly and keep aside.
  2. Chop drumstick, onion, tomato to fine slices.
  3. Heat oil in a kadai / pan and temper with mustard, cumin seeds, fenugreek & curry leaves.
  4. Add chopped onion, garlic, green chilly and fry them till transculent.
  5. Add in the finely chopped tomatoes and sauté well.
  6. Now add drumsticks and combine well.
  7. Add cleaned prawns and sauté in together.
  8. Add turmeric pwd, red chilly pwd, coriander pwd and salt.
  9. Mix well. Allow the prawns to get cooked in the masala.
  10. Once the masala thickens and let out oil, add thick tamarind juice, water and jaggery.
  11. Keep the flame in simmer for 6 to 7 mins and cook covered.
  12. Add the ground coconut paste and boil for 2 more minutes.
  13. Now you can see,  oil floats on top of the thick curry.
  14. Time to turn off flame.
  15. Transfer Eral Kuzhambu to  serving bowl with fresh coriander leaves garnishing.
  16. It makes an awesome combo with white rice & pappadam.


Step by step....
Try this tasty recipe, sure you’ll love it..:)

Your comments & suggestions shall help me a lot and inspire me to make more dishes.

Once again thanks Sangeetha for this nice opportunity..!"
♬ Sangeetha♡Nambi ♬

October 6, 2012

Guest Post III

     Its another GUEST POST from another Master.... As i already stated in my previous post, today am going to reveal who is that master is.... Yesssssssss !!! Before revealing about the profile, just want to tell a few words about my Guest. I know her from the day one i become a blogger. She will be the first commentor in all my post, many times. She motivated in many ways and the only blog which i admired in my begineer day is her blog. I love all her post mainly the clicks she use to post. Even i have forced her many times to place step by step pictures but due to some space contraints she restricted herself. But strictly i told her, i need step by step clicks for this guest post as i have loads of space in my blog :P Well, without rejecting my request, even she sent a beautiful recipe with wonderful clicks. Ok Ok... I understand, without any further delay, today's Guest Post was done by Priya of Priya's Versatile Recipes. Applause !!!!! :) Here comes her flavourful "Herbed breadsticks" for you gals, Enjoy !!!

Real flavored Bread Sticks....

ALL YOU NEED:
All purpose flour 2 cups
Whole wheat flour 1 cup
Active dry yeast 1 tbsp
Luke warm milk 1/2 cup
Coriander leaves (chopped) 2 tbsp
Dry Oregano 1/2 tsp
Dry Thymn leaves 1/2 tsp
Dry red chilly flakes 1 tsp
Butter (room temperature) 1 tbsp
Olive oil 2 tbsp
Sugar 1 tsp
Salt 1 tsp

My long time aim... Step by Step clicks of Priya.... :)
METHOD:

1. Add the yeast,sugar and salt to the luke warm water and keep aside until the yeast turns foamy.
2. Take the flours in a bowl with chopped coriander leaves,dry oregano and dry thymn leaves,add gradually the foamy yeast,olive oil and water.
3. Knead as a soft and smooth dough,cover the bowl and keep the dough in a warm place for two hours..
4. Once they doubled their size,punch down the dough,dust the dough with flour and roll them as a medium size long rope like strips.
5. Arrange the rolled breadsticks over a baking sheet lined over the baking tray.
6. Preheat the oven to 350F.
7. Arrange the baking pan in middle rack of the oven and bake for 25-30 minutes until the crust of the bread stick turns golden brown.
8. Brush immediately the bread sticks with the butter.
9. Serve warm with a bowl of soup.

Thanks for giving me an opportunity for making this guest post. - Priya

Priya, my heartfelt thanks for accpeting my request and contributing to my space... Thanks much again.... Friends, do visit her space, when u find time... You'll get lot of stuff there... Please dont miss it....

♬ Sangeetha♡Nambi ♬

October 2, 2012

Guest Post II

     Its GUEST POST again.... Nowadays me become "LIKE" NO NO "REAL" Lazy girl to compose a recipe post. At the same time, i dont want to leave my blog space too. So after a big discussion with my brain !, decided to post a couple of GUEST POST which i got from my co-bloggers. Those two persons are really THE MASTERS in our food blogging world. Yes, one is Aarthi of YUMMY TUMMY and another one is SHUUUUUUUUUU !!! Its S E C R E T !!! Will reveal it in my next post which her guest post too... :)

    Now, let me tell some words about Aarthi. Just a couple of months back, i got a chance to visit her space. From that time to till date, i never stopped visiting her space even she didnt post any recipe :) She is a newly married gal but when we check her blog, we feel like visiting a 25 yrs old married women's blog. Yes, she has a huge huge, Plenty plenty, different different (Watlese!) varieties of recipe in her space that too with Step by Step recipe. Always i use to wonder/admire how she gets time to take a click of every steps !!! Major highlight was, she use to click the ingredients used and label it accordingly. OMG ! i am impressed aarthi. So, here comes here "CHICKEN CURRY" in her own words....

Here it is.......

Over to Aarthi:
    **When I was asked to do a guest post by Sangeetha, I never wanted to say no to her..I accepted immediately..Thank you Sangeetha for giving me this opportunity to post my recipe in your awesome blog. I am really happy to meet all your viewers and do this post for them.

Let me tell something about me..

"Hai Friends.. My Name is Aarthi, I blog at YUMMY TUMMY. It is a food blog which has recipes around the world in step by step instructions with pictures which will be so helpful to you(I hope). I welcome all of you to come and explore my blog."
Now let me talk something about this recipe.. This is one of very basic chicken curry you could make. It calls for very basic ingredients, so you can whip up this no time. The cool thing about this is it is cooked in a pressure cooker which cooks the chicken quickly and makes it so meltingly tender..
I hope you will love this. Drop at my place sometime.
."

ALL YOU NEED:
Fennel Seeds / Saunf 2 tsp
Ginger Garlic Paste 2 tblspn
Garam Masala Powder 2 tsp
Curry leaves 1 twig
Chilli Powder 2 tsp
Onion large sliced 2 Nos.
Chicken 1/2 kg
Chopped Tomato 4 Nos.
Salt 3 tblspn
Oil To Taste

Her well-owned step by step clicks....

METHOD:

1. Take a pressure cooker and heat oil in it. Add in fennel seeds and let it crack.
2. Add in onions and saute for 5 mins.
3. Add in ginger garlic paste and mix well.
4. Now add in salt and all the spice powders and mix well.
5. Throw in tomatoes and curry leaves and cook till the tomatoes turn mushy.
6. Add in chicken pieces and toss well in the masala.
7. Now cover the pressure cooker and let it cook for 4 whistle. Now lower the flame and cook for 15 mins
on a low flame. Switch off the flame and let the pressure go all by itself.
8. Open the pressure cooker and add coriander leaves and mix well.
9. Serve with rice or roti.**

Aarthi, my heartfelt thanks for accpeting my request and contributing to my space... Thanks much again.... Friends, do visit her space, when u find time... You'll get lot of stuff there... Please dont miss it....

Check the GUEST POST I here...

♬ Sangeetha♡Nambi ♬